Showing posts with label baking. Show all posts

Saturday, June 25, 2022

6816. Make homemade granola

 For the cookie exchange, Janis made homemade granola. That stuff was addictive as heck. She gave us the recipe and I was meaning to make some. Finally I was sick of yogurt and decided to make her granola. 

The recipe is fairly straight forward. I just didn't have nuts or dried fruit in the house.

First you mix all the ingredients besides the nuts and fruit together.

Spread it on a baking sheet and bake. 

Stir periodically while baking.

Tip: Make sure you get put it in a bowl or something after you take it out of the oven so it doesn't dry on the foil and make it harder to get it off.

Mix in your fruit and nuts or my case chocolate chips and coconut.

Enjoy.

It is super easy and super tasty. I will definitely make it again and maybe will remember to get walnuts or almonds for a nutty crunch. I should also get dried cherries or cranberries for a fruity mix in. We'll see about that. I liked the chocolate and peanut butter chips to give it sweetness.

Wednesday, November 24, 2021

6855. Make a lattice top pie

 I like a nice lattice top pie since it looks pretty and very professional especially on a cherry or blueberry pie. Apple and peach definitely need two crusts. When I was tasked to make the cherry pie for Thanksgiving, I knew had a to attempt a lattice top pie. 


I hate make pie crust and decided to use the Ninja to make it easier. I added the flour and shortening to the food processor and pulse. Then following the directions in my Betty Crocker cookbook, I quickly added water and it actually formed into a ball. I divided it in half and rolled out the bottom crust. It turned out okay. Rolling things into a circle are not my forte and like usual I rolled a bit too thin and had to patch spots.

The filling was a basic cherry pie filling of Door County cherries, sugar, flour, and butter for some reason. After a quick call to mom to confirm that I needed to drain the cherries, the filling came together quickly and got poured into the pie plate. 

Then it was time to attempt the lattice top. I attempted to roll out the other crust in the circle but still haven't mastered this. Then I cut the dough into strips.

I laid several strips across the pie.

Then came the tricky part of doing the weaving. I did pull back the vertical strips and wove the horizontal strips through it. I had to remember over and under. It was not as easy it sounds. As you can tell my strips were too thin and broke in places and I had to patch jobs. For my first attempt, I was impressed.

In the oven it went and after about an hour, the masterpiece was done. It may not look pretty but it sure tasted good.

I told the hubby I need to make more pies so I can practice making crust. It was not flaky (I think due to the food processor) and the edges weren't pretty. I have no objection making pie and the hubby I don't think would mind either. 

Monday, May 18, 2020

Quarantine Adventures -- Homemade Garlic Knots

As I was reading the recipe for cinnamon rolls, I noticed that I could use the same recipe to make garlic knots. I figured why not.


Like with the cinnamon rolls, you mix yogurt and self rising flour together.


Then you roll out the dough.


Cut them into strips.

Tie into a knot.

Bake. Then brush with garlic butter and sprinkle with Parmesan cheese.


Initially I did without the garlic and Parmesan cheese. They weren't bad but I definitely used too much flour. I used the whole 1 1/2 cups it called for. It was too much. I probably could have used only about a cup.

We decided to try them again with the garlic butter and less flour. I only used about 1 1/4 cups, just enough for the dough not to be sticky. They tasted much better. They just didn't look like garlic knots but more like pretzels.


We will definitely make them again using the garlic butter.

I really like this dough. It's easy and very versatile. Maybe I will I will use to make pizza rolls or something in the future. Stay tuned.

Saturday, April 11, 2020

Quarantine Adventures -- Make Homemade Cinnamon Rolls

The hubby is a big fan of cinnamon rolls.. especially homemade ones. Browsing Pinterest, because what is there to do, I found a recipe for homemade cinnamon rolls that didn't require any yeast or rising time.


The dough is literally 2 ingredients -- self-rising flour and Greek Yogurt.  Self-rising flour was as scarce as yeast. We managed to find a small bag of it at Walmart. I snatched it up.


Mix the flour and yogurt together and then roll out the door.


Once the dough is rolled out, brush with melted butter, sprinkle with brown sugar and cinnamon.


Roll into a log -- tightly. That part is hard. Then cut into slices.


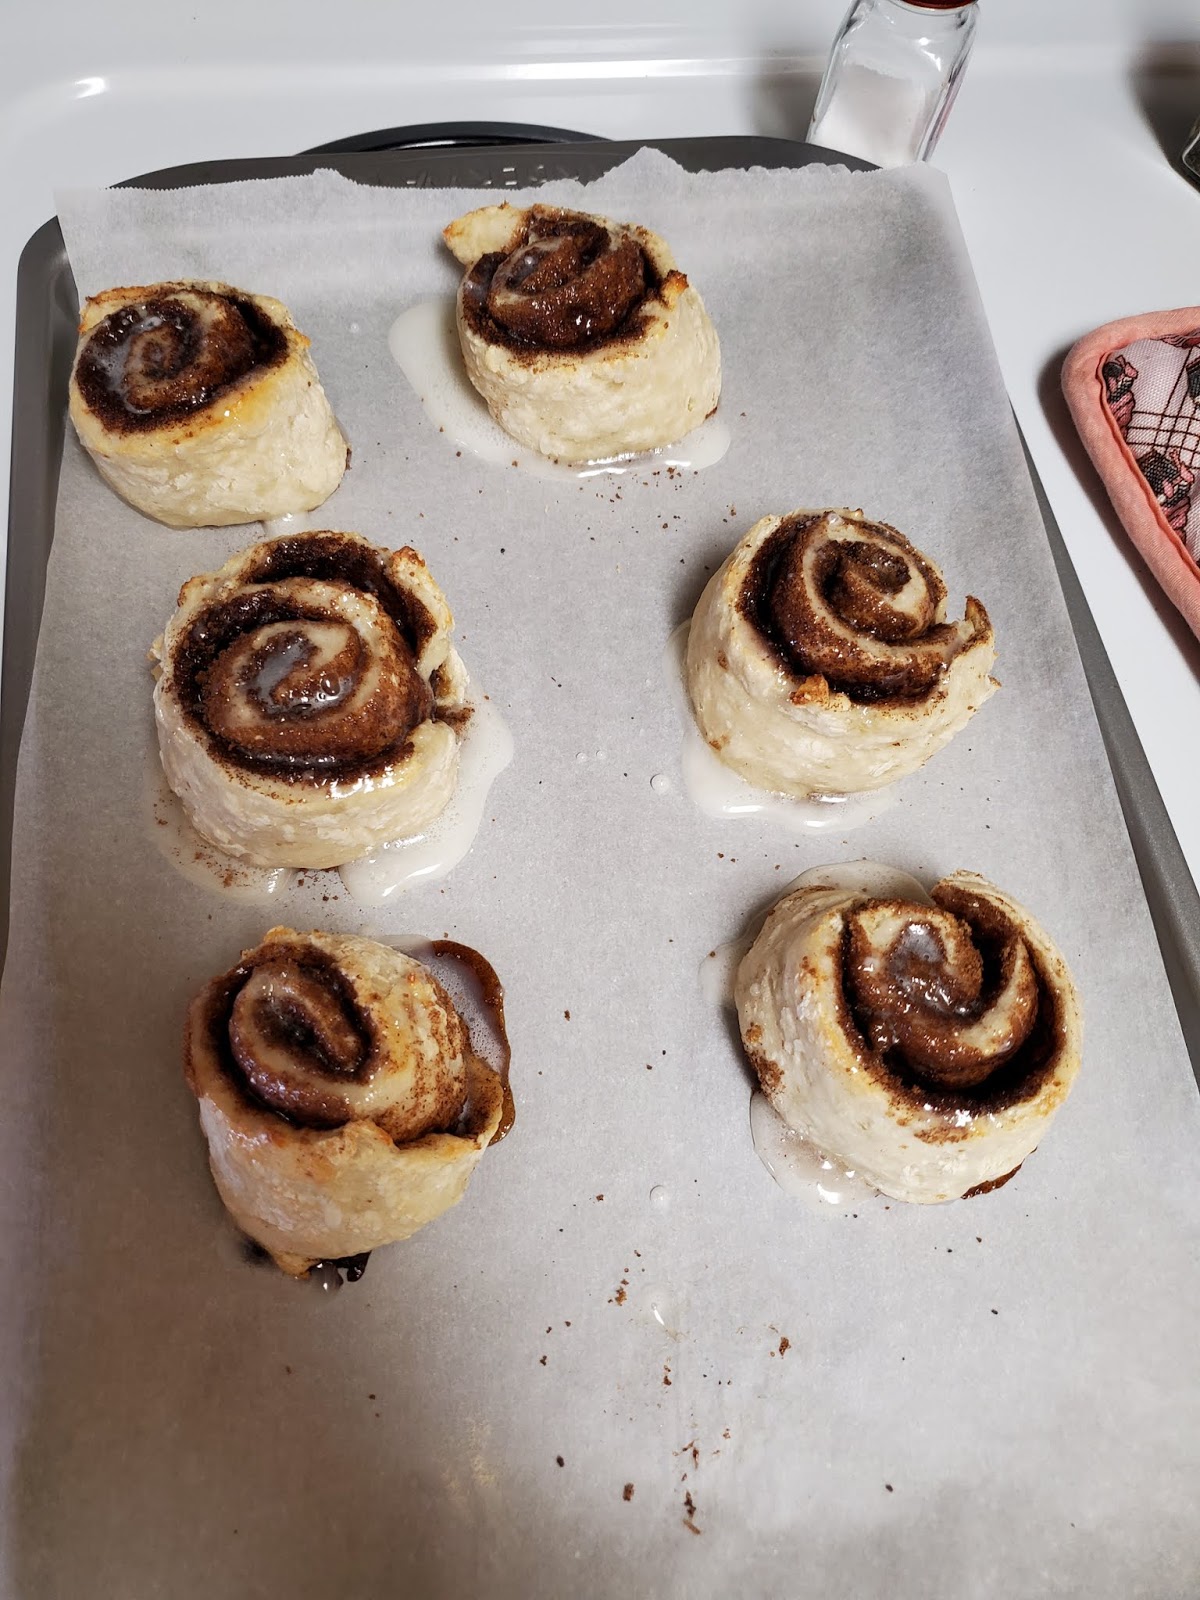
Bake them.

Cool and then frost with an icing.


Enjoy.

Yes, they do have a slightly sour taste -- like sourdough. But they are quite tasty. Even the hubby likes them. I will definitely make them again.


Wednesday, January 22, 2020

20 in 20 -- Make a new dessert

At work we were having a cultural dessert day and I decided I'd bring something German. Many German recipes are apple or plum based. I had an apple cake recipe that I could use but it required 2 cups of apples. I wasn't in the mood to peel and chop that many apples.

I searched Google and Pinterest for a week or so. I enlisted Stacy's help. She actually gave me a few good suggestions. One that I was contemplating making. Then I found the perfect recipe for Apfelkunchen. It was a basic butter cake recipe topped with apples.. 5 or 6 ingredients in all and the best part it called for 1 apple.


The only problem is that it's not apple season in Wisconsin. I picked up a couple galas because they were on sale. I usually bake with Macintosh.

This was probably one of the easiest cake recipes I made. Cream butter and sugar. Add a couple eggs. Add the flour and baking powder. Spread in springform pan. Peel and slice the apple then press into cake. Bake. Sprinkle with powder sugar. Eat.


Everyone at work said it was really good. It was the perfect texture. I would bake it just a tad bit less because the crust got crispy but it was it was very tasty. I thought it needed more apple flavor and maybe that's what I get for using Galas. Only 2 tiny pieces remained after I took home two pieces.

The hubby on the other hand wasn't overly impressed. He did say it was clearly a German dessert as it was blander than most apple cakes. He would try it again if I make it with Macintosh.

I'm hoping the Macintosh apples make a difference since it's such a simple cake. I was told it looked fancy all sprinkled with powder sugar. It would be perfect for a brunch or tea party.


Saturday, November 14, 2015

Kitchen Adventures: Cookie Dough Whoopie Pies

At cookbook club the other night, I was looking at cookbooks for next month and picked up The Cookie Dough Lover's Cookbook by Lindsay Landis. The recipe I first turned to was for Cookie Dough Whoopie Pies. The hubby loves cookie dough and has been asking me to make whoopie pies forever. When we first moved into our apartment, I picked up a whoopie pie pan and 3 years later it still hasn't been used..until today.

I think my biggest reason for not making whoopie pies was that I thought they were too much work. I only have 1 small whoopie pie pan and I didn't want to be tied up in the kitchen all day making whoopie pies. To alleviate this problem, I cut the recipe in half since I don't know what we were going to do with 20-24 sandwiches except feed my coworkers. The recipe itself was pretty easy. When I cut the recipe in half, I figured we would have about 10 whoopie pies. Um, yeah my calculations were way off. I got 4.5 whoopie pies out of the half batch. Either I made mine bigger or my math was way off.. 4 is actually a really good number for us. We can try them and don't have to worry about them going bad since they only last about 3 days.
Whoopie Pie Pan

I did tweak the recipe slightly since the hubby doesn't like dark chocolate. I used regular cocoa powder instead of dark cocoa powder and omitted the espresso powder. I had to pick up the marshmallow creme. I came home with marshmallow fluff and momentarily panic. Google reassured me marshmallow fluff and creme are the same thing. It's like tissues vs. Kleenex.

I had the 1/2 whoopie pie and it was scrumptious. I'm hoping the hubby agrees.


Cookie Dough Whoopie Pies -- from the The Cookie Dough Lover's Cookbook

Ingredients (makes 24 sandwiches according to the cookbook)... If you want to make a half batch, see the note at the bottom for the conversions of the odd measurements.

For Cookies:
2 Cups Flour
1 tsp baking soda
1/2 tsp salt
1/2 cup dark or Dutch-processed cocoa powder
1 tsp instant espresso powder
1 cup sugar
3/4 cup whole milk
1/3 cup vegetable oil
1 egg, lightly beaten
2 tsp vanilla

For Filling:
1/2 cup (1 stick) butter, room temperature
1/2 cup brown sugar
1/3 cup flour
1/2 tsp salt
1 (7 oz) jar marshmallow creme or fluff
1 tsp vanilla

Directions:
Preheat oven to 350. In a large bowl, sift together flour, baking soda, salt, cocoa powder, and espresso powder. Stir in sugar. Make a well in the center of the dry ingredients and stir in milk, oil, egg, and vanilla.

Put the wet ingredients in a well in the dry ingredients

Stir until flour is incorporated and no large lumps remain; mixture should have the consistency of thick cake batter.

Line a baking sheet, if you don't have whoopie pie pans, with a silicon mat, parchment paper, or just spray with cooking spray. Drop batter by the tablespoonful approximately 2 inches apart. Bake 10 to 12 minutes, or until cookies are set. Let cool on baking sheet about 5 minutes, then transfer to a wire rack to cool completely. Repeat with remaining batter.


To prepare filling, beat together butter and brown sugar in a large bowl with an electric mixer on medium speed until light and fluffy, 2 to 3 minutes. Mix in flour and salt on low speed until incorporated.

Add marshmallow creme and vanilla and beat until fluffy. Stir in chocolate chips.


To assemble whoopie pies, sandwich 1 heaping tablespoon of filling between two two cookies.


Press until filling spreads evenly to the edges Repeat with remaining cookies. Refrigerate in an airtight container, whoopie pies will keep for up to 3 days.


I'm guessing you could freeze the cookies until you are ready to use them and then just making the filling.

Now that I know how easy this are, I have a feeling my whoopie pie pan will get more use.

**Note** If you want to make half the recipe, here are the conversions for the odd measurements.
1/3 cup = 5 Tablespoons + 1 teaspoon (2 1/2 Tablespoons + 1/2 teaspoon for half the recipe)
3/4 cup = 12 tablespoons (6 tablespoons for half the recipe)
1 egg = 3 tablespoons when beaten (1 1/2 tablespoons of beaten egg)

If you don't have whole milk, you can substitute 6 tablespoons evaporated milk and 6 tablespoons water for the 3/4 cup whole milk.

Friday, January 2, 2015

#445 Bake homemade bread

When I wrote my bucket list this was meant to be done without the help of bread machine and that is how it was accomplished. This one kind of got accomplished by accident. We were planning on having homemade chicken noodle soup for dinner and didn't pick up bread. I wanted to try a loaf in the crockpot but I didn't have any parchment paper. I went in search for a recipe that could easily be done before dinner. Since I didn't have any wheat flour, unbleached flour, or other types of flour in the apartment besides regular (bleached) all purpose flour, I had to find a recipe that use that. And I succeeded.

This recipe from Lil' Luna has become my go to bread recipe. We even use it for cheesy garlic bread. The downside is that it makes 3 loaves. I was able to convert the measurements to make 1 loaf with a little bit of math and my pamper chef measuring cups.

French Bread from Lil' Luna
 
Ingredients
  • 2 TB dry yeast
  • ½ cup warm water
  • 2 cups hot water
  • 3 TB sugar
  • 1 TB salt
  • 5 TB vegetable oil
  • 6 cups flour, divided
  • 1 egg, beaten- for glazing bread
Instructions
  1. Dissolve your yeast in ½ cup warm water.
  2. In a separate bowl combine hot water, sugar, salt, oil and 3 cups of the flour. and stir.
  3. With the paddle attachment mix the yeast mixture and the hot water-flour mixture together.
  4. Add the remaining 3 cups of flour, one cup at a time, mixing after each addition. Once all of the flour is added, let sit for 10 minutes.
  5. Separate your dough into 3 pieces. On a floured surface roll each piece into a 9x12 rectangle. Roll it up like a jelly roll (long way).
  6. Place the dough on a greased baking pan, seam side down. Score the bread across the top 3 or 4 times, and brush with your beaten egg. Let dough rise uncovered for 30 minutes in a warm place.
  7. Bake on the middle rack for 20 minutes at 375 or until golden brown


We used this particular loaf for cheesy garlic bread on New Year's Day. 

It is not as light and airy as I think bread to be but it is not doughy. It is a little more on the dense side with a soft crust. 

This is one bucket list adventure that I was hesitant to try because I was worried how it would turn out. I had nothing to worry about. The bread is fantastic.

#482 Make Homemade Donuts

Today I attempted "real" homemade donuts meaning from scratch and without a donut maker. In the past I have made donut holes and mini donuts using my donut maker.

I asked for full size donut pans for Christmas and did not get them. I picked up 2 of them at Bed, Bath, and Beyond earlier in the week. I was excited to try my go to chocolate donut recipe from Something Swanky in them but the hubs doesn't really care for chocolate. I mentioned that I might just make funfetti donuts using a cake mix. He didn't want a donut that tasted like cake. He wanted a light, airy sugary donut. Back to pinterest I went and found these from Krissy's Creations. They looked pretty good and didn't seem too complicated.

After procrastinating some this morning, I decided to give them a try. I knew they were going to be a bit of a time consuming project with letting the dough rise twice but I had all day to get them done.


After mixing everything together and kneading it, I let it rise for an hour. Luckily the hubs, is more observant than I am and knew that it truly doubled in size.


Then I rolled it out and cut it out. I do not have a donut cutter yet so I ended up using 2 of my biscuit cutters. The large one to for the actual donut and the small one for the middle. I did not use a lot of pressure so at first I had to tear some of the donuts from the dough.


I used the middles to make donut holes. Both the donuts and the donut holes had to rise again for 45 minutes before they could be baked. I used this time wisely and went for a quick walk around the neighborhood.


Fresh out of the oven donuts. They did not rise as much as I thought they would. 


All covered in cinnamon and sugar.

Truthfully, I was quite disappointed on how these turned out. They were not light and airy at all. I believe I over baked them as I did not think they were slightly golden brown and let them bake longer. The donut holes are better since they only baked for about 7 minutes instead of 9. I will probably give these another shot and see if I can figure out what went wrong. I also look forward to using my new donut pans in the near future.