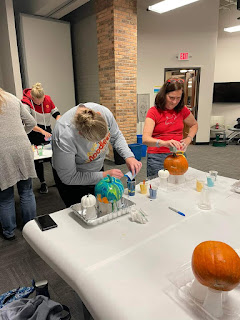
Kaukauna Library does a Make and Mingle once a month on Wednesday evenings. It is a chance to create something nice and make new friends. This month the craft was paint pour pumpkins. I made sure I was online at 9 am to reserve my spot. I was able to snag the first spot.
Paint pour pumpkins is essentially what is sounds like.. pouring paint over pumpkins. However, it is not quite that simple. Well it could be but to get a real marble look, there are a few steps involved.
Materials
- Paint Pouring Medium -- this allows the paint colors to not mix with each other.
-Acrylic Paint -- 2 to 3 colors. I choice Dark blue, light blue, and yellow.
-Pumpkin -- Pie pumpkins or mini pumpkins
-Disposable Cups
-Stir Sticks -- popsicle sticks work great
Steps
1. Pour some paint pouring medium in a cup. One cup for each color
2. Add an equal amount of paint into the cup
3. Mix the medium and paint together. Make sure it is mixed really well. If the paint mixture is too thick add a few drops of water to thin out. This will help with pouring.
4. Layer the colors into a 4th cup. You want as many layers as possible so just a little of each color before adding the next color. Save some color in each cup in case you need to file in the gaps.
5. Pour the paint over the pumpkin in several places. You can hold it by the stem and rotate to get to mix to let the colors fill in all the spots.
6. Using your stir sticks, fill in any gaps.
7. Let dry for several days.
It is messy. We propped our pumpkins up on cups to help cover the entire pumpkin. We also had them in aluminum pans to contain the mess. You will still get your hands covered in paint.
I have seen that you can do it without the pour medium but you might not the marbled look we got. Also the paint will peel up when you try to remove it from the cups or tray once dry so be careful not to pull off all the paint.
Next month, I'm trying my hand at glass etching. This should be interesting. Stay tuned.


No comments:
Post a Comment